
Learning Aperture as a New Photographer
If you’re a new or budding photographer, you’ve probably heard a lot about the Exposure Triangle and, most likely, the term “Exposure Triangle” totally confuses you. And you know what? That’s okay!
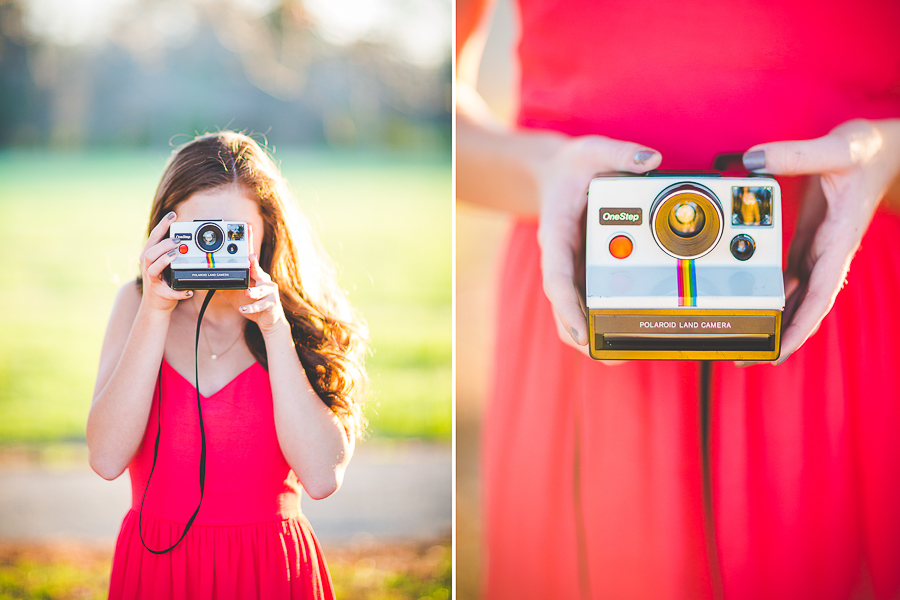
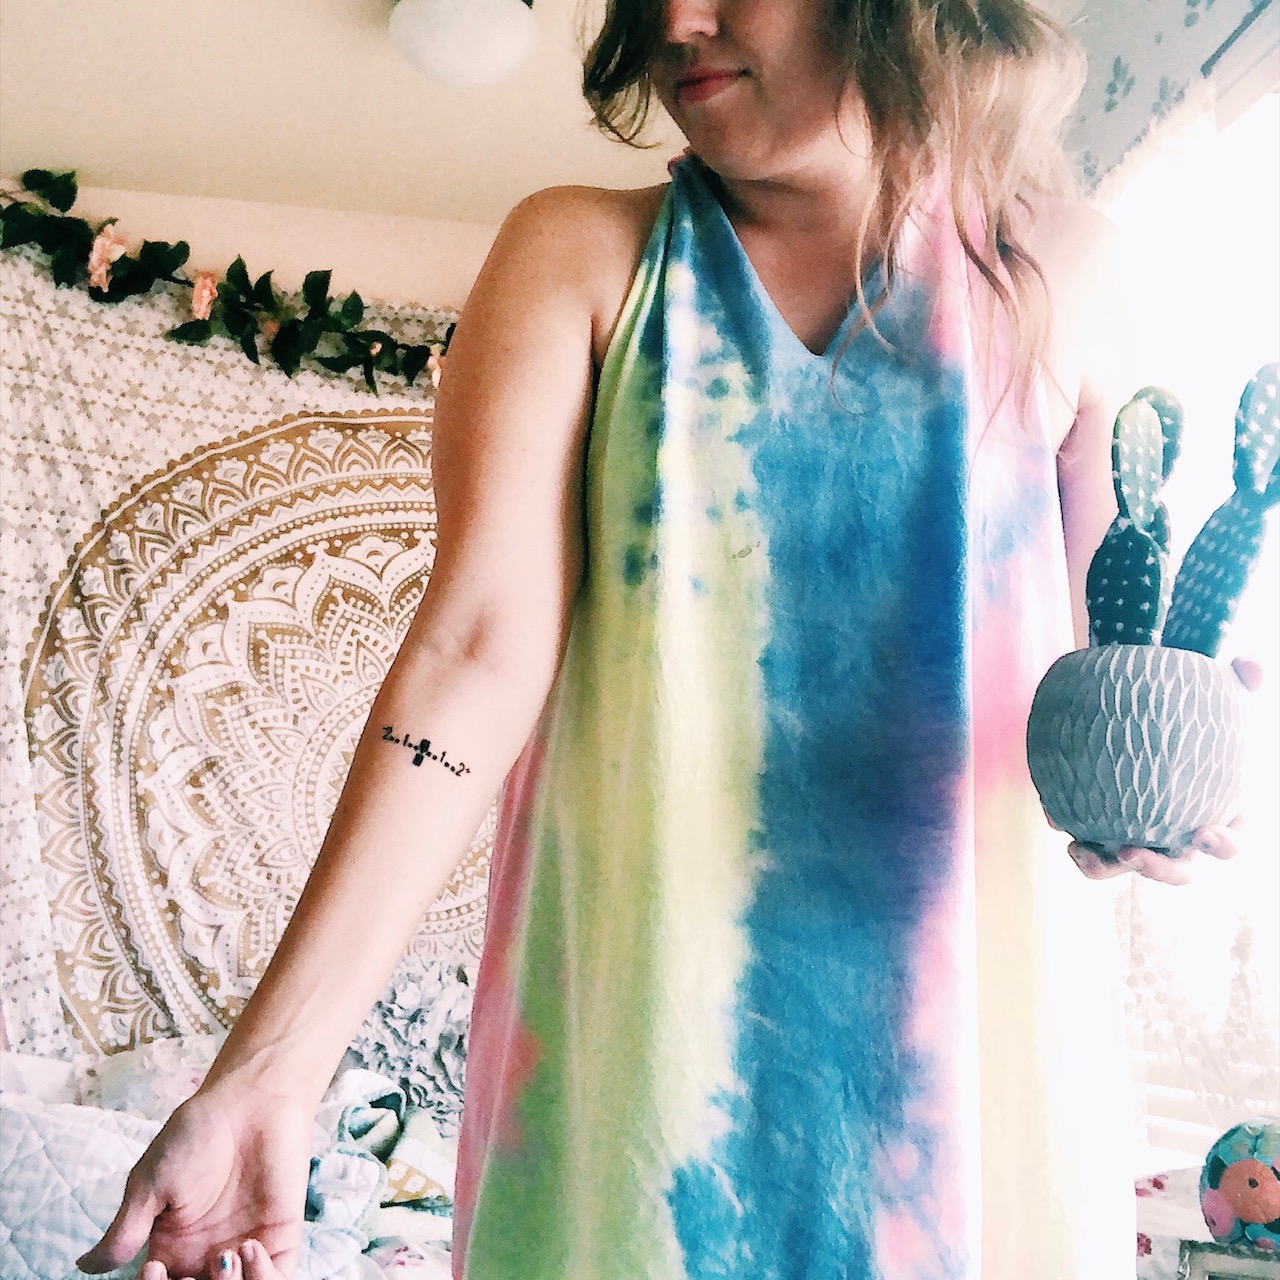
Aperture for left photograph: 1.2 // Aperture for right photograph: 1.2
![]()
![]()
![]()
![]()
We ALL start somewhere! When I was a new photographer, I didn’t realize that I could select where my camera focused and I used to get really frustrated when my camera didn’t intuitively read my mind about where I wanted my focal point to fall. I mean, couldn’t it tell I needed it to fall on an eye?! What were all those distracting red boxes for anyway? It sounds a little ridiculous – and honestly it kind of was! – but I didn’t even have the vocabulary to do a quick google search about how to make my camera focus the way I wanted it to focus. When I’d been a casual photographer, I didn’t need to know any kind of terminology and, as a self taught photographer, I didn’t know where to start when it came to looking for help outside of my camera manual (and, let’s be real, I wasn’t going to read that).
A couple other super funny / ridiculous things I did before I totally knew my camera: When my parents got me my first SLR in high school (yeah! I’m old enough that I started with a film camera!), I accidentally took the lens off and, not knowing anything about cameras or lenses, I felt an immense amount of shame course through my body, thought “I broke my camera!!”, put the camera back in its bag, and then shoved the camera bag under my bed because I was certain I’d broken it and that I was about to be in an enormous amount of trouble. Then, a few years later, when I got my first DSLR (digital!), I switched to Manual without knowing what it was, took a picture that turned out completely black and, again, felt a huge wave of shame because I was totally positive I had broken the camera by fiddling around with the buttons on top. Ha!
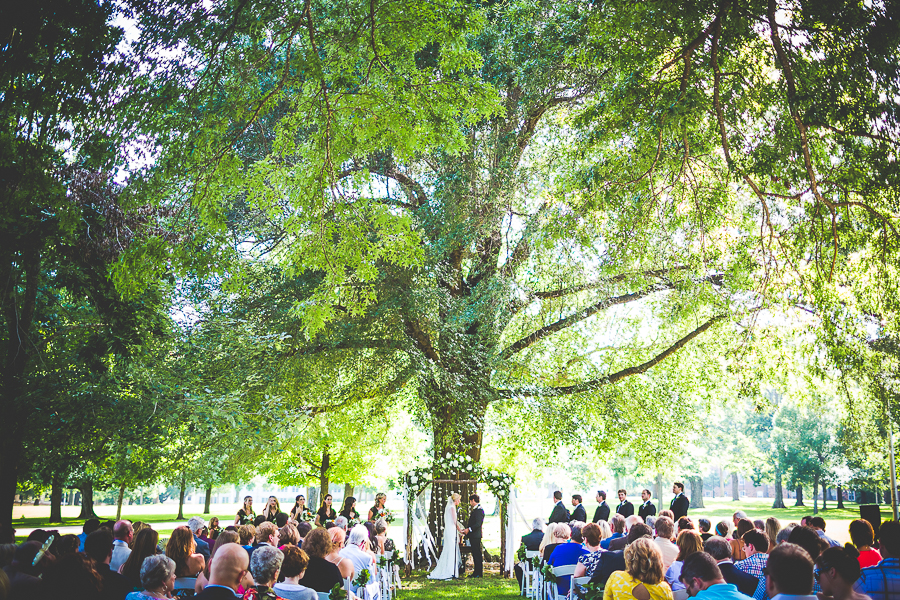
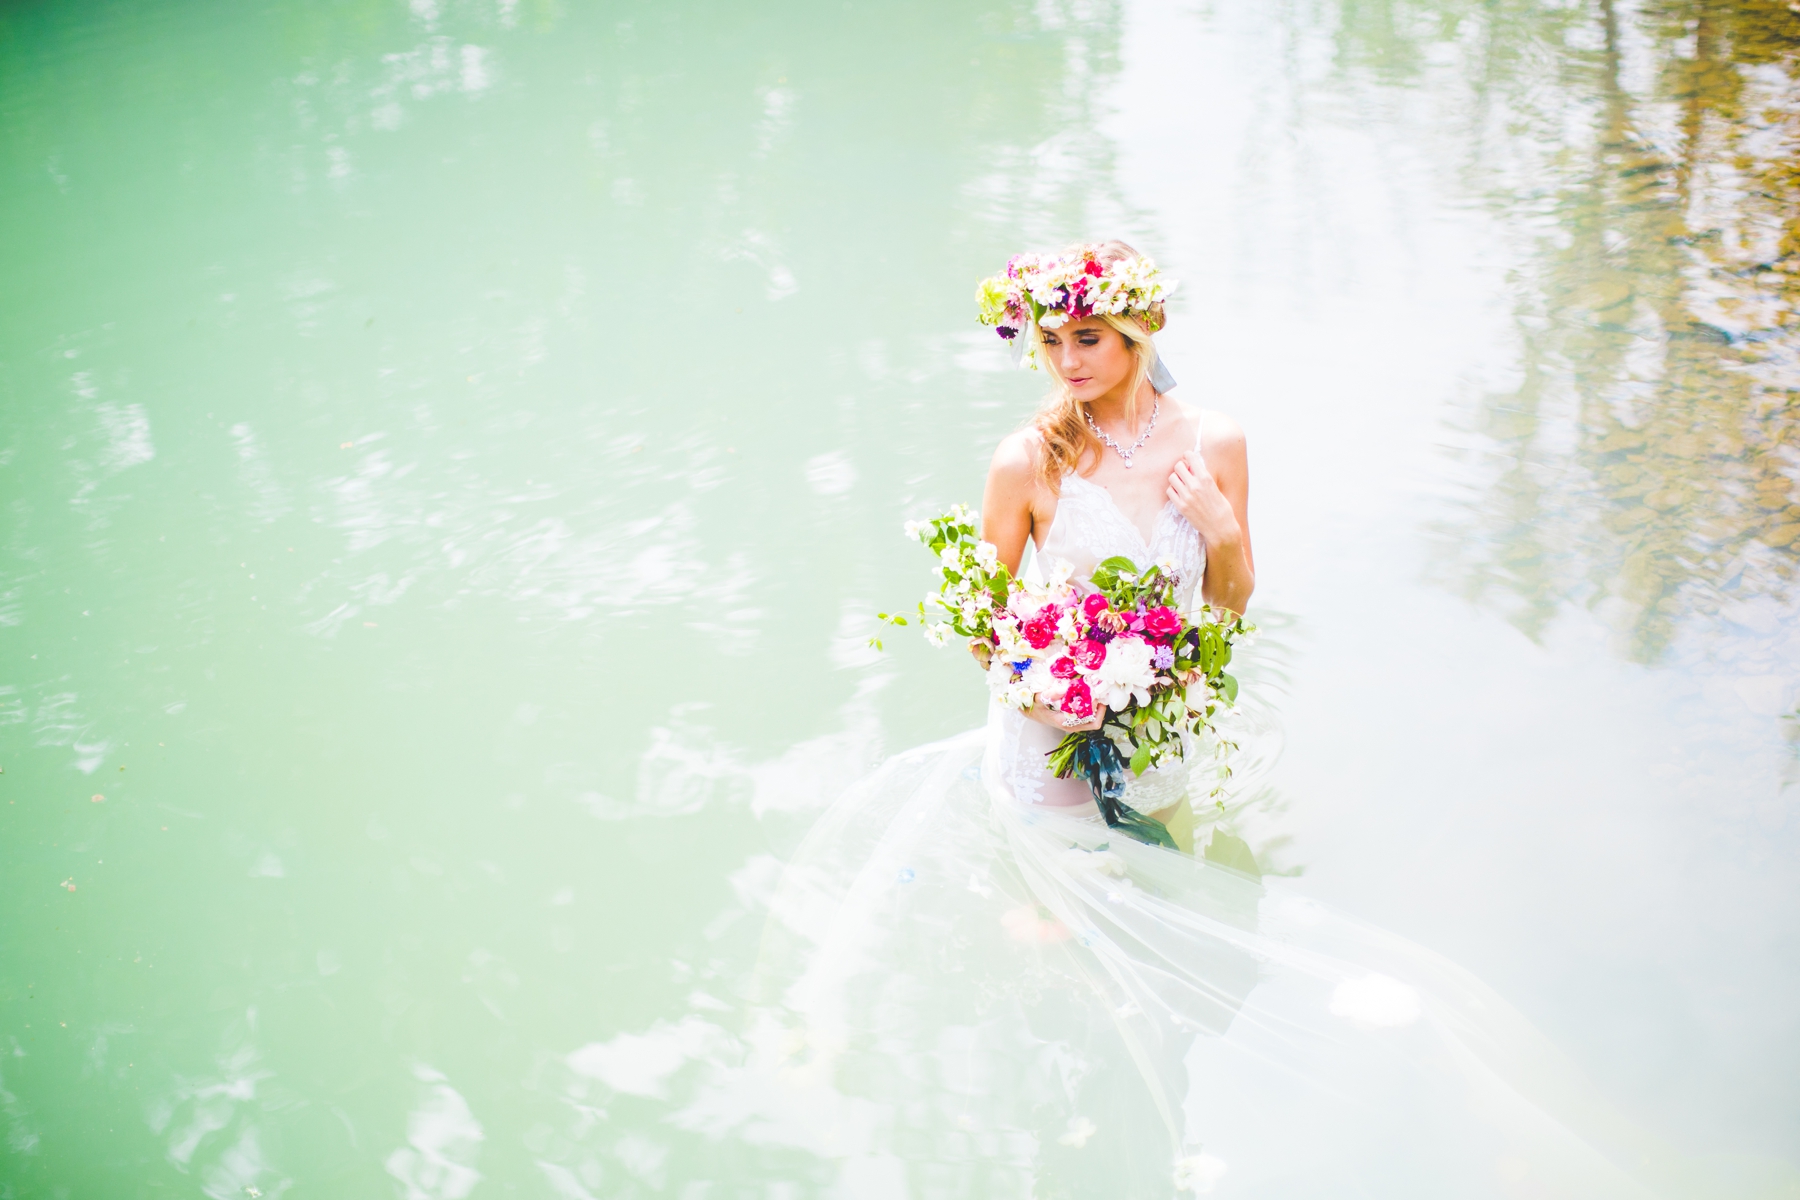
Aperture for Ceremony Photo: 1.4 // Bouquet Shots: 1.6 // Chair Photo: 1.4
![]()
![]()

![]()
![]()
Anyway! I don’t tell these stories for any specific reason except this: We all start somewhere. If I can be the 17 year old who thought she broke her camera by detaching a lens and also the 27 year old who published her first ebook about photography, you can learn photography, too! It can be confusing and some of the instructions feel contradictory but, at the end of the day, learning to shoot Manual is going to open up a million doors for you. And so! Let’s start a four part series on shooting Manual!
First! Before we talk about anything, I want you to grab your camera, look at the top of the camera, and switch the dial to “M”. Don’t be intimidated – shooting in partial Manual settings like Aperture Priority can actually set you really far back because it helps you understand part of Manual while also providing a crutch – and, before you learn anything else, just remember this: the line of the light meter needs to stay in the very middle. This can change when you become more advanced but, for now, just keep the line in the very center of the light meter. Not sure what a light meter is? Here’s a link and here’s a tattoo, too!
![]()
![]()
![]()
![]()
Second! It’s taken 550 words to get here but, today, we are going to talk about aperture.
Here’s the (short!) skinny! Aperture controls how much of your photograph is in focus. Sound simple? It is!
Here’s a more complex explanation: When a photographer selects an aperture for a photograph, they control how much of their photograph is in focus and they control how much light is let into their camera. For example, if a photographer selects a wide aperture, they are able to let in a ton of light but they are also going to have a very narrow focus field. This sounds great (and it’s my favorite way to shoot!) but, the wider the aperture, the harder it is to nail focus. Two of my lenses open all the way to 1.2 and, when I shoot this wide, I literally have to hold my breath before I click the shutter. It’s totally worth it – the results are gorgeous! – but shooting wide open cannot be done haphazardly. It takes focus and a lot of practice to be able to create an image that is in focus at any aperture and, the lower the number, the more concentration it takes to learn.
Furthermore, if a photographer decided to select a more narrow aperture – let’s say 5.6 – more of their image will be in focus but much less light will let into the camera. This means several things! If a photographer is shooting in a low light situation, shooting at a narrow aperture will most likely require artificial lighting and may even require a tripod. Choosing an aperture can absolutely be a creative decision but, when an entire photograph is in focus, the photograph can sometimes come off looking snapshot-ish. This, of course, will totally depend on the subject matter, the type of lighting, and the setup of the photograph but narrow apertures can be limiting in that they don’t let in a ton of light and, since focus is achieved a bit easier, a photographer can feel a bit more lax. While this may be great for many photographers, it’s not a great choice for me because I love shooting in low light situations, letting in a ton of light, and achieving the soft background that is achieved when a photograph is taken with a wide aperture.
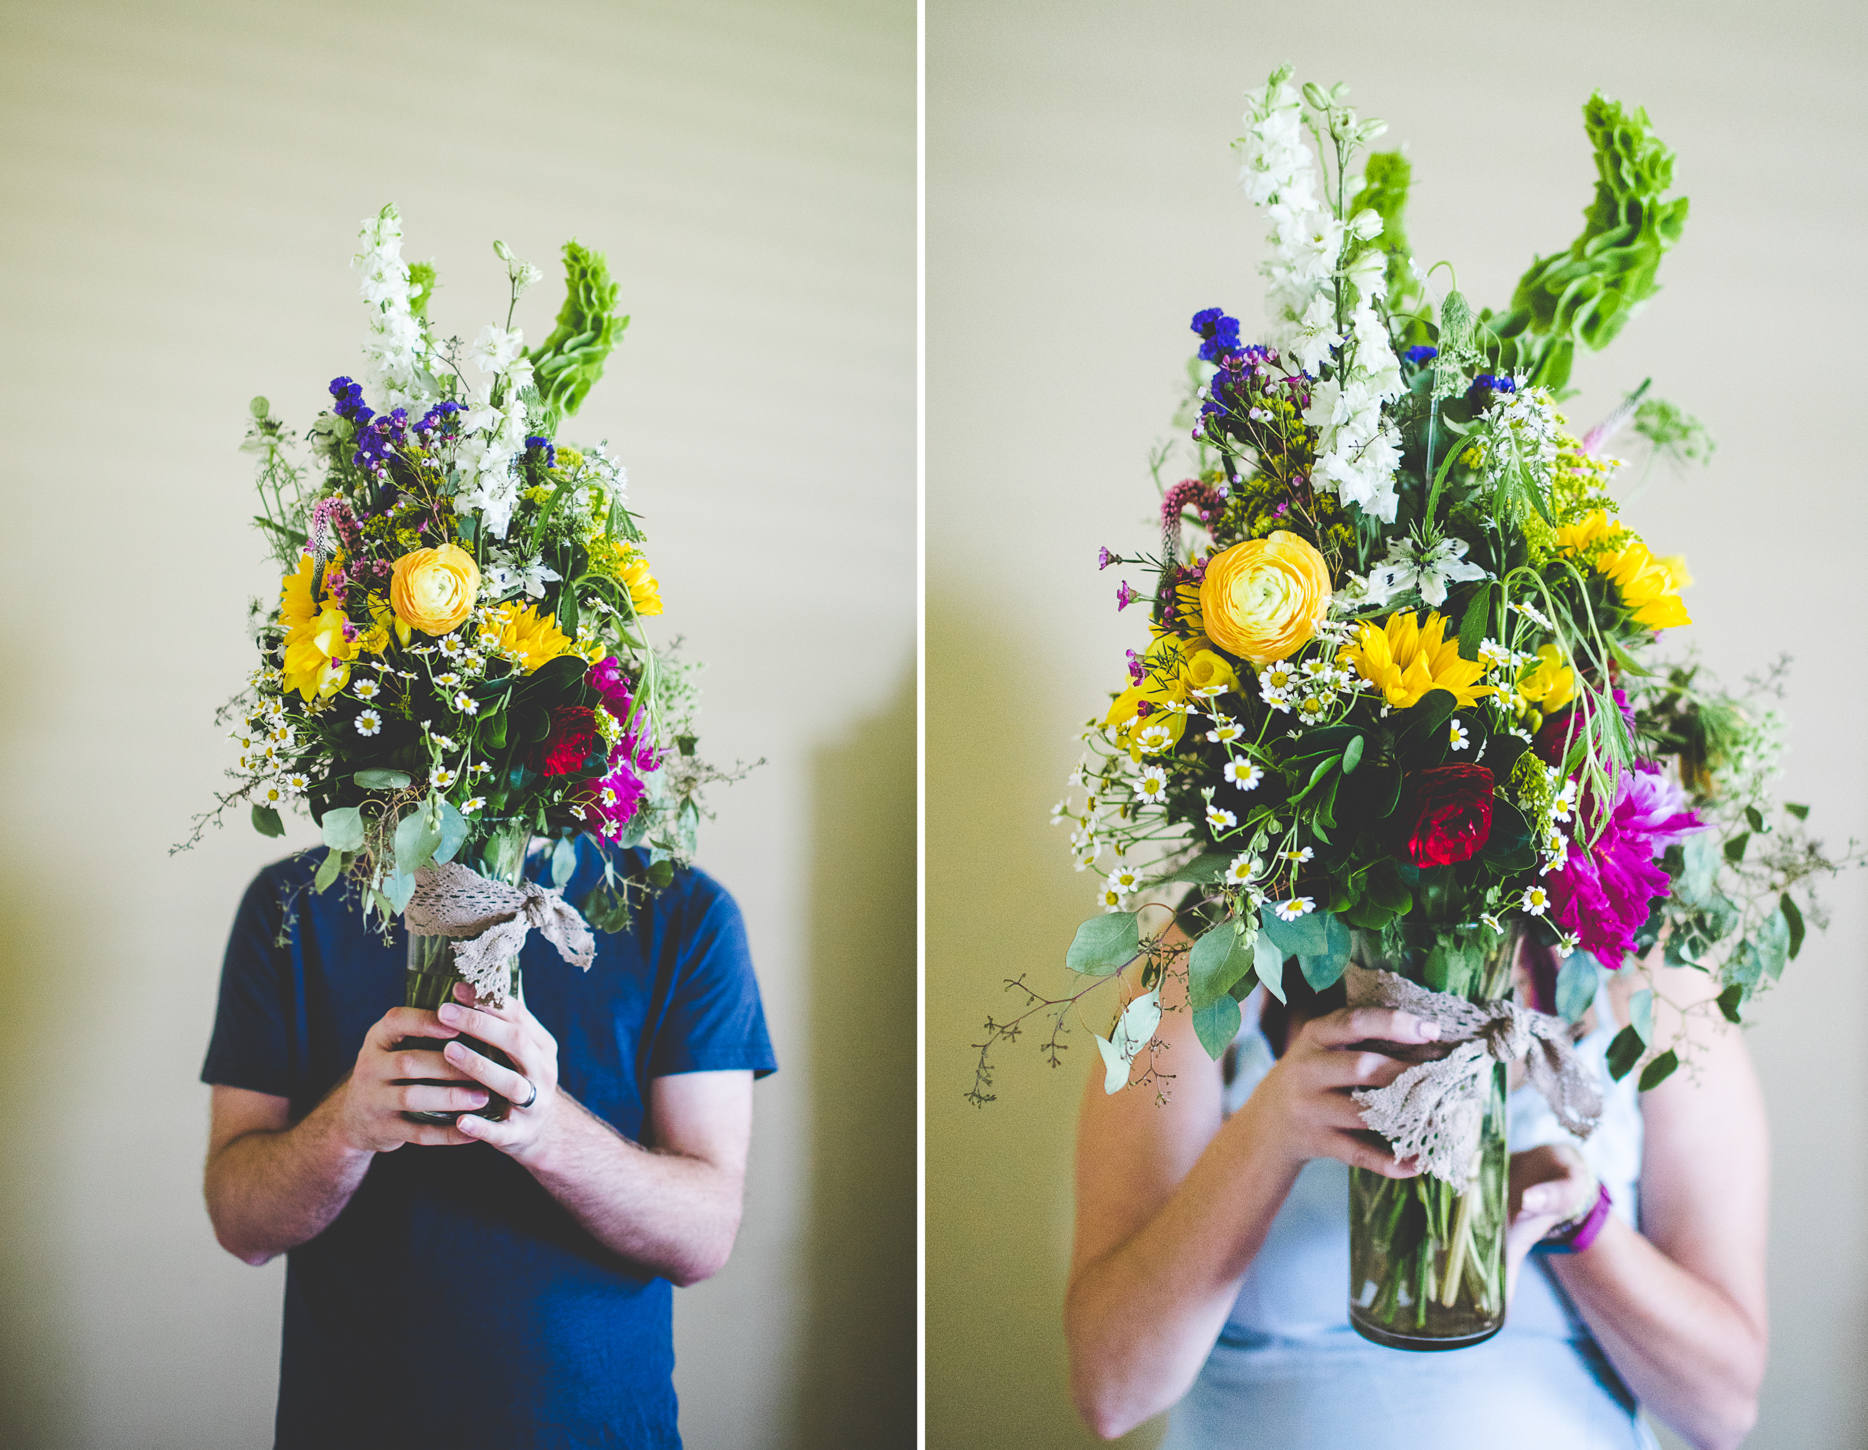
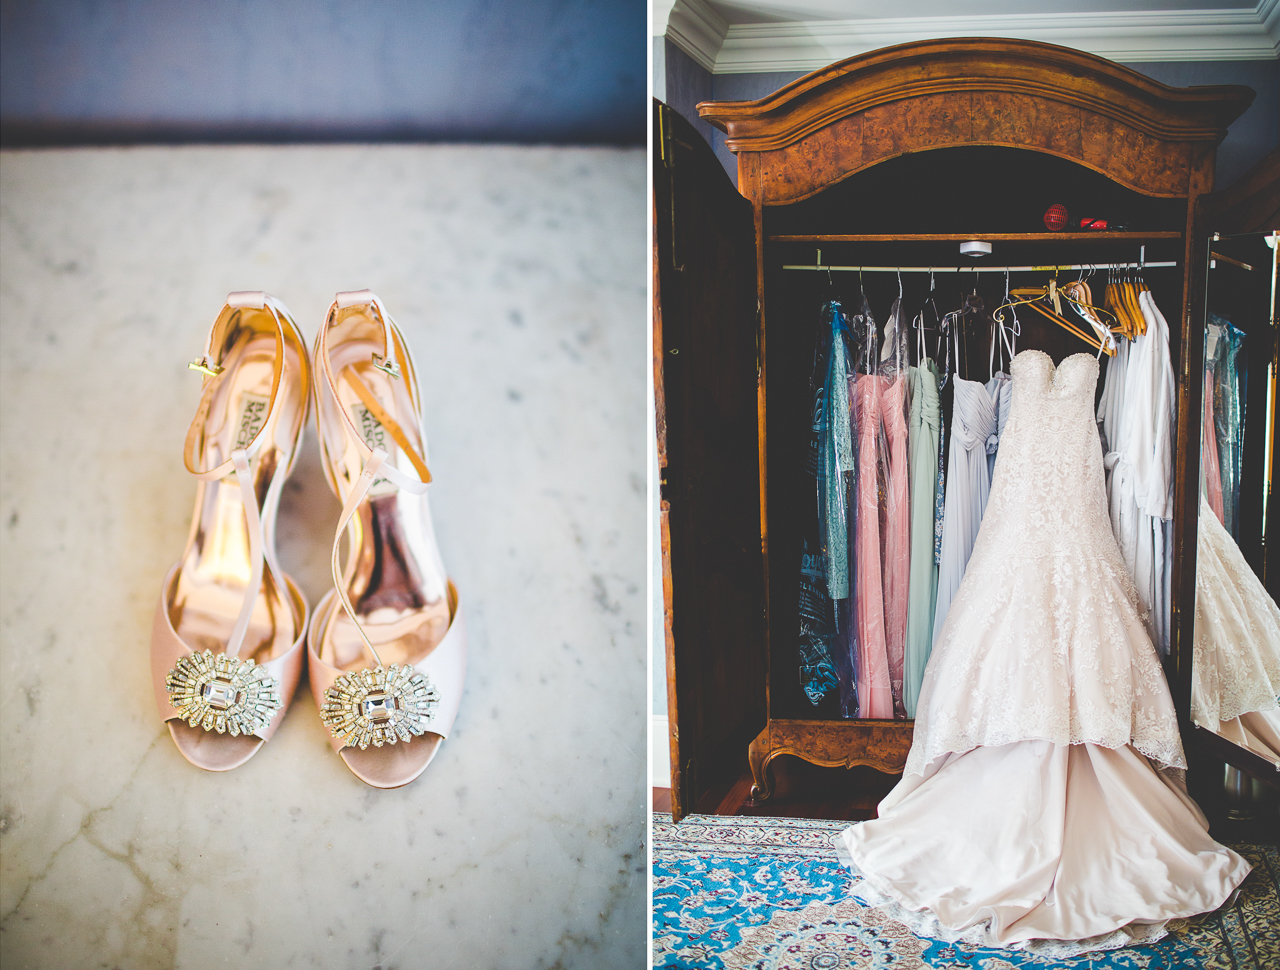
Aperture for Water Shot: 1.4 // Shoe Photo: 1.4 // Wardrobe Photo: 1.4 // Bride and Groom Photo: 1.4
![]()
![]()

![]()
![]()
Finding a sweet spot for your preferred aperture is 100% a creative choice and that’s why I love it so much. I like shooting between 1.4 and 1.8 as much as possible but, in certain situations, I definitely raise my aperture if I want a different result. If, for example, I photographed a wedding party where everyone is shoulder to shoulder in a line (resulting in the same focal plane), I could shoot this with a wide aperture of 1.4 or 1.6. If, however, I stacked a wedding party with bridal party members both behind and in front of the couple and I wanted everyone’s face to be in focus, I need to shoot at a higher aperture – most likely 2.8 or 3.2. But! If I’m trying to create a photograph where the viewer is drawn to the couple and the bridal party around them doesn’t need to be in razor sharp focus, I can still shoot at 1.4 or 1.6.
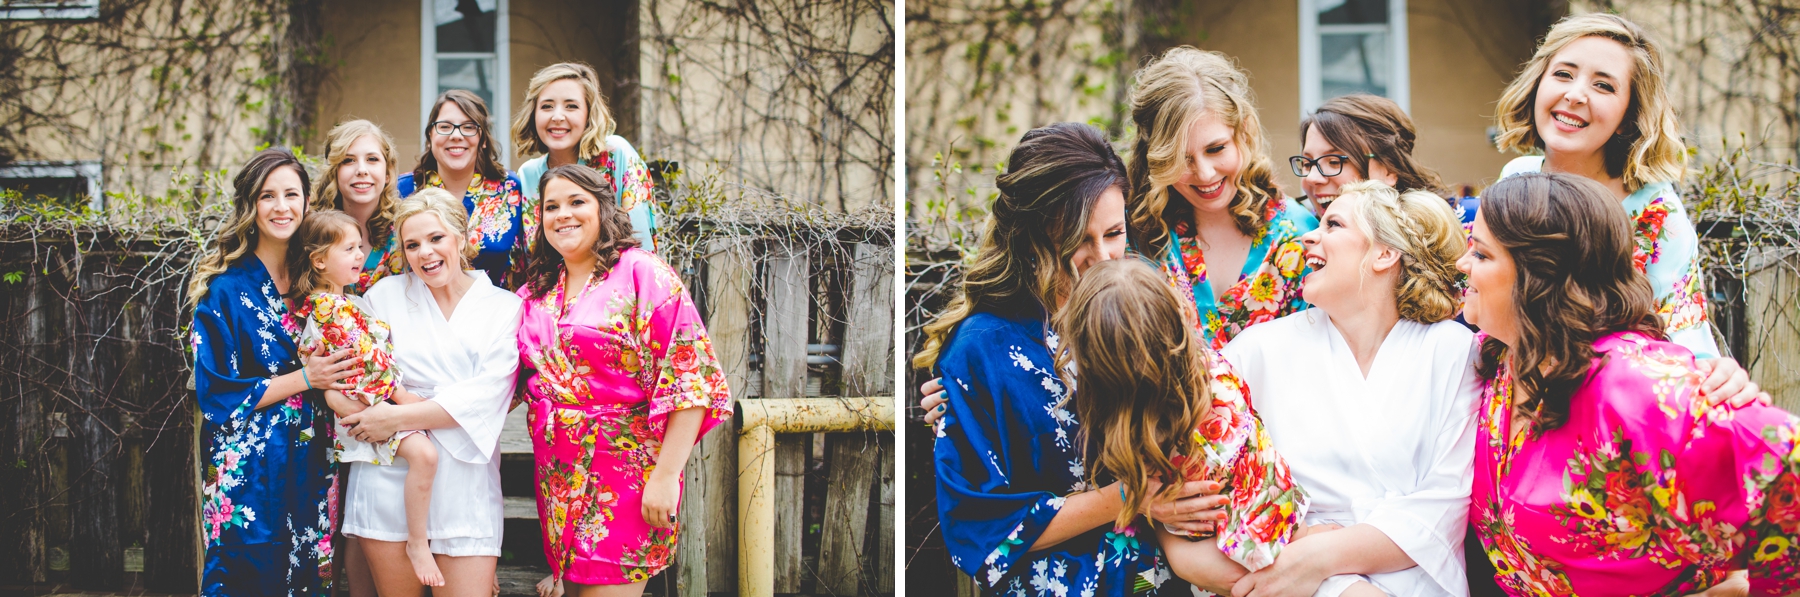
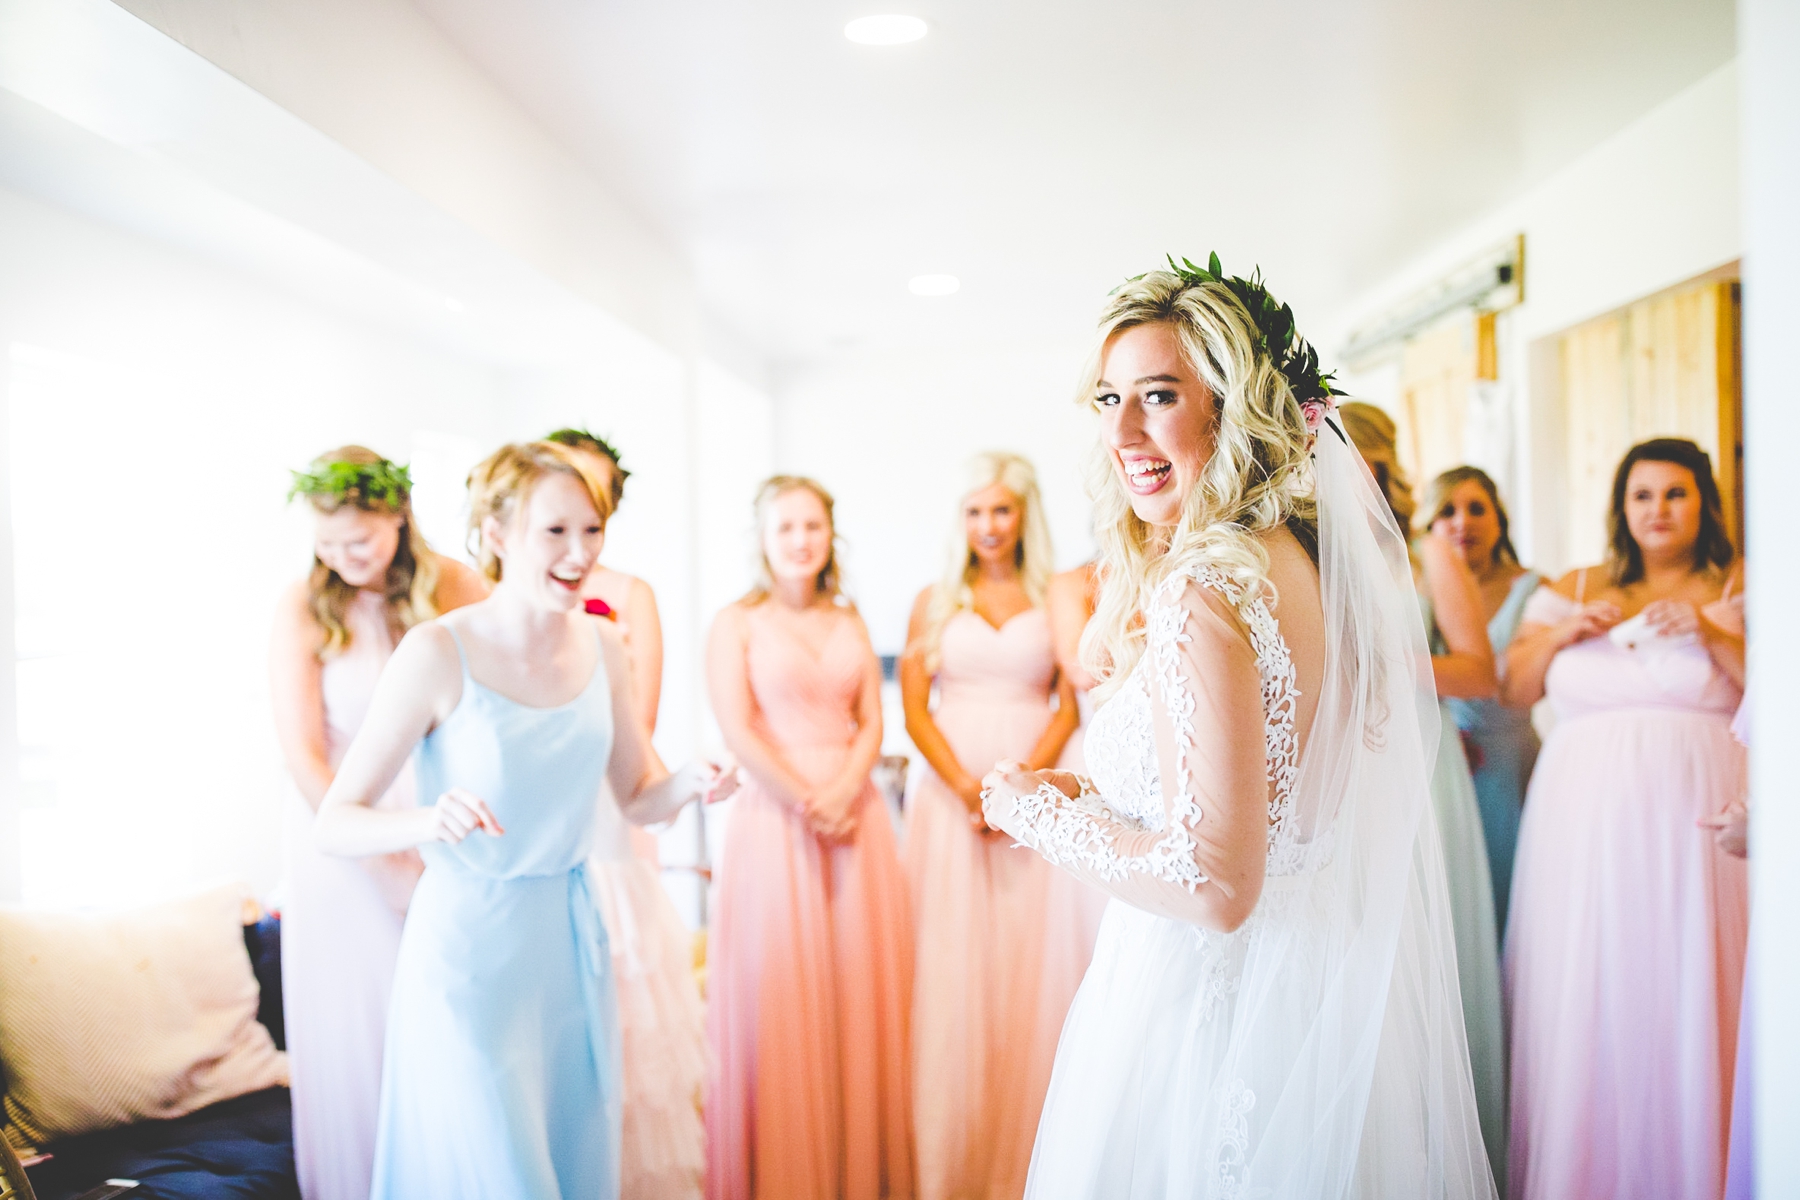
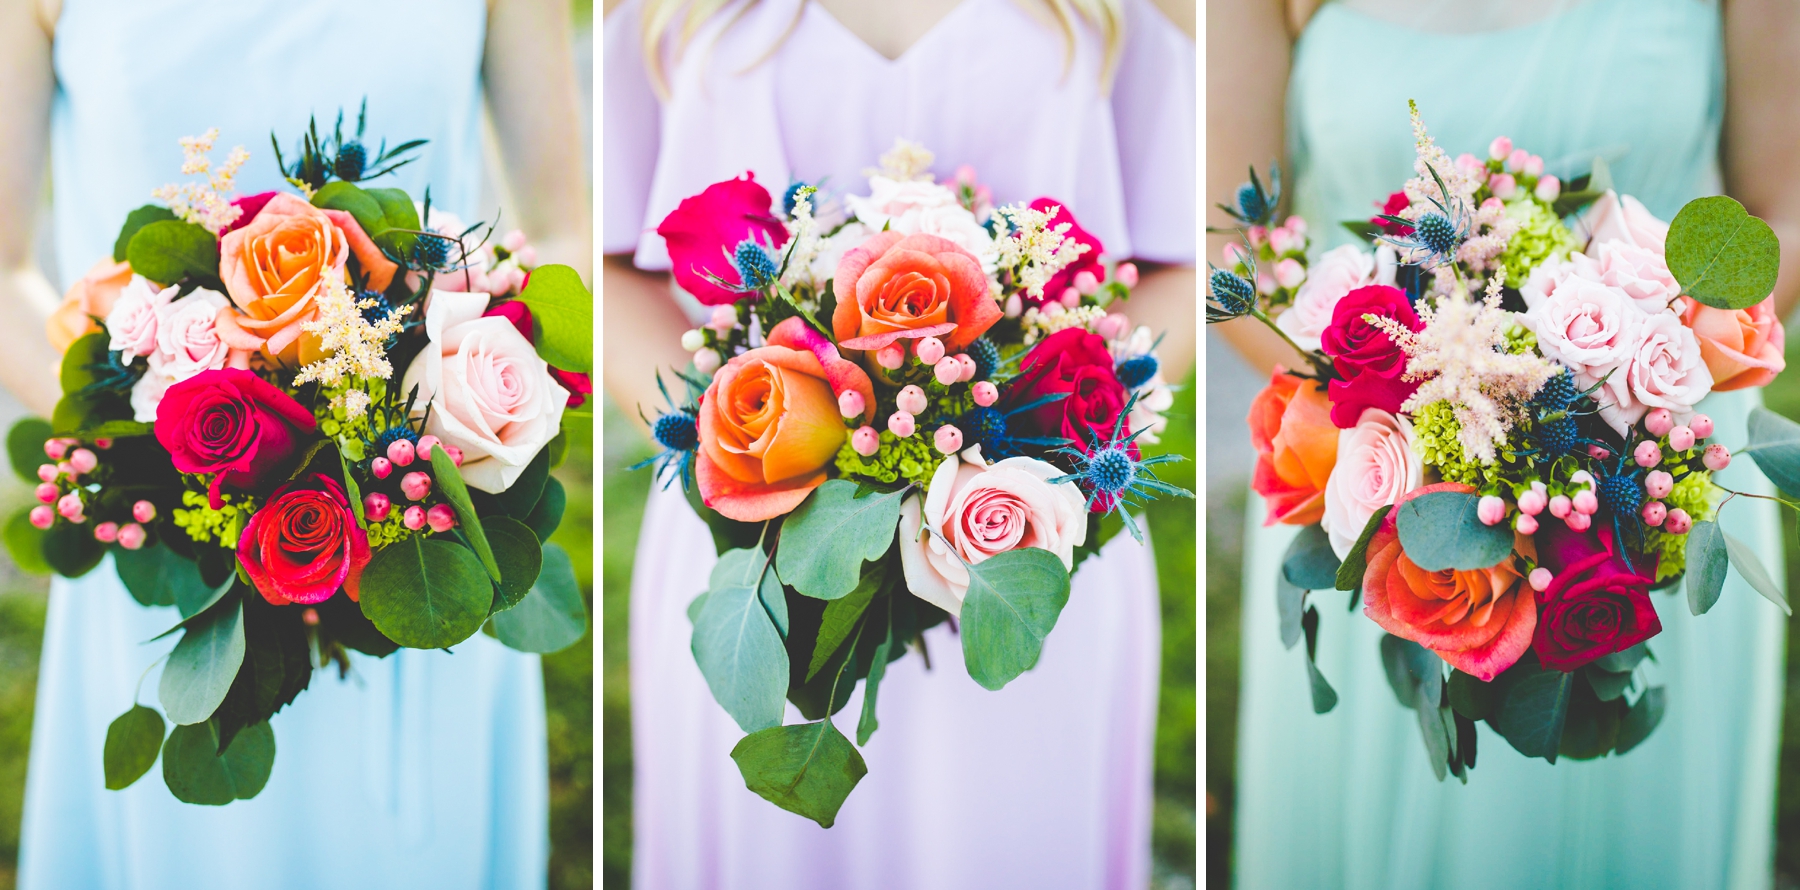
Here’s an example! In the bridesmaid photographs, everyone needs to be in focus in the photograph on the left. This requires a smaller aperture – I believe this was shot around 2.0! – and, on the right side of the frame, my focus was on the bride. Since I wanted to capture the bride laughing while surrounded by her friends, only my bride needed to be in focus. Do you notice how, on the left, the details on the vines are easy to see? Now look at the right! Since the aperture was wider (and because I stepped closer), the vines begin to blur and, on top of that, the bridesmaid faces are no longer clear, either.
Aperture of Left Photo: 2.2 // Aperture of Right Photo: 1.8
![]()
![]()
![]()
![]()
The exact same techniques are used here! In the traditional groomsmen portrait, I shot at a higher aperture so that everyone’s face would be in focus. The next photograph, though, is one hundred percent about the groom. While the groomsmen in this photograph are more in focus than the bridesmaids in the photo above, what matters is this: the groom is the main focus. This photo is not about his friends – it’s about him being surrounded by his friends. Does the difference make sense? Aperture is a creative choice and it can be used to reflect so many different emotions and feelings and subjects, too! It’s incredible!!
Aperture of Formal Photo: 2.5 // Aperture of Groom Photo: 2.0
![]()
![]()


![]()
![]()
Should you always shoot at the same aperture? Not even close!
Landscape photography is often taken with a narrow aperture – sometimes as high as 22! I shoot family portraits at weddings with a narrow aperture (I want grandma to be in focus!), always shoot wedding rings with at least an aperture of 4.0, and most macro work needs to be done with a narrow aperture.
Let’s take this away from just photographs! Think of some classic paintings: If Bottecelli’s Birth of Venus was taken with a camera, a small aperture would have been used. While Venus is definitely the center of the photograph and also the part of the photograph that the artist wanted us to be drawn to, the angels on the side of the painting are very clearly defined.
Compare this to one of Degas’ ballerina portraits. Degas’ ballerina portraits are very fluid and, while some of the paintings are completely impressionistic and don’t have a main focal point, in many of his paintings one dancer will be in focus and the rest will be blurs behind her. When this technique is used, the painting is not meant to be a portrait of the whole scene – it’s meant to be a portrait of someone within a scene.
Not sure what I mean about a portrait within a scene? Here’s a few examples!
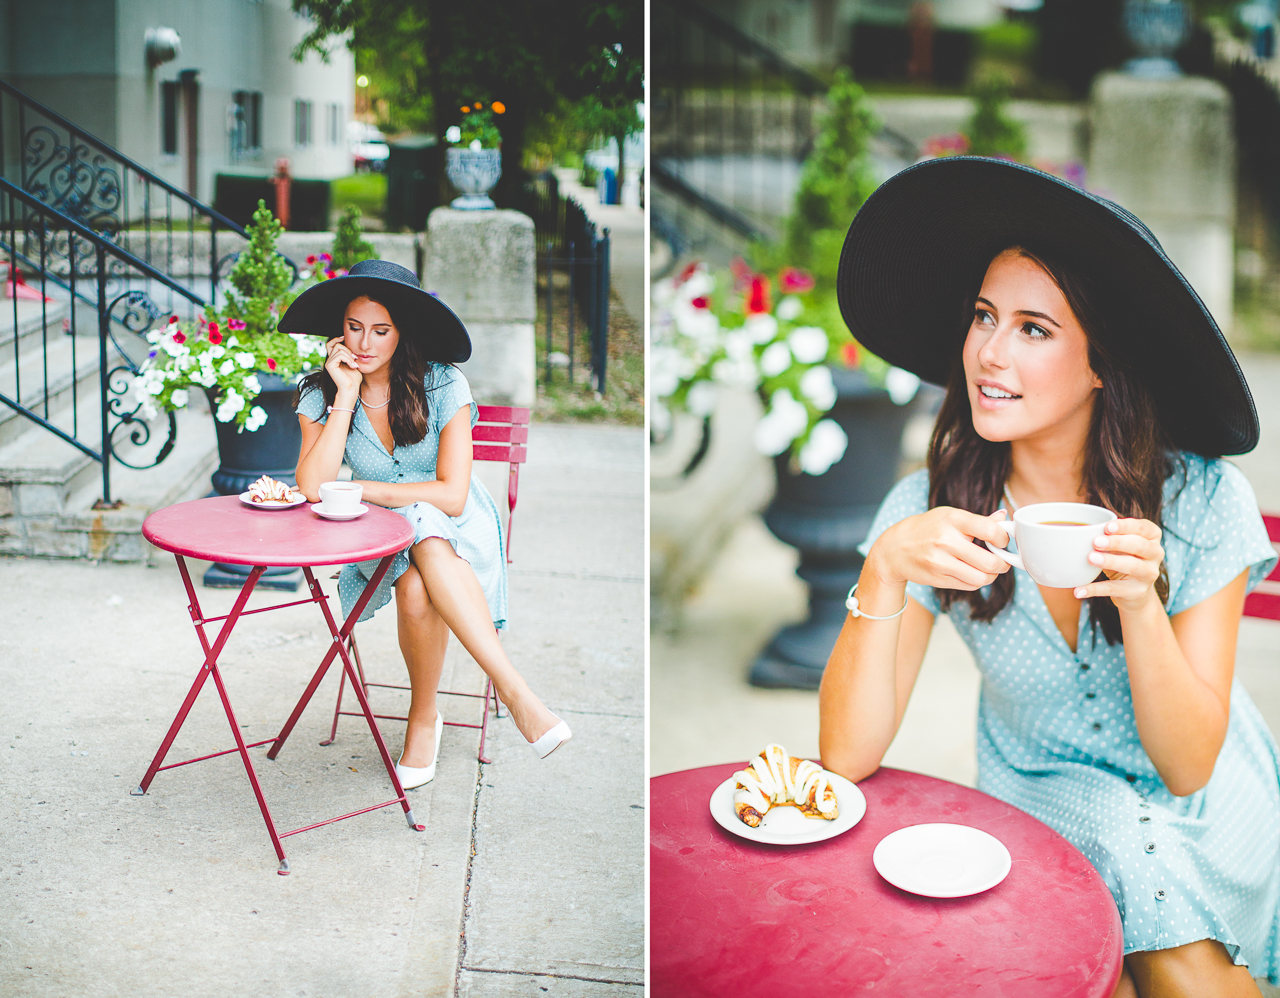
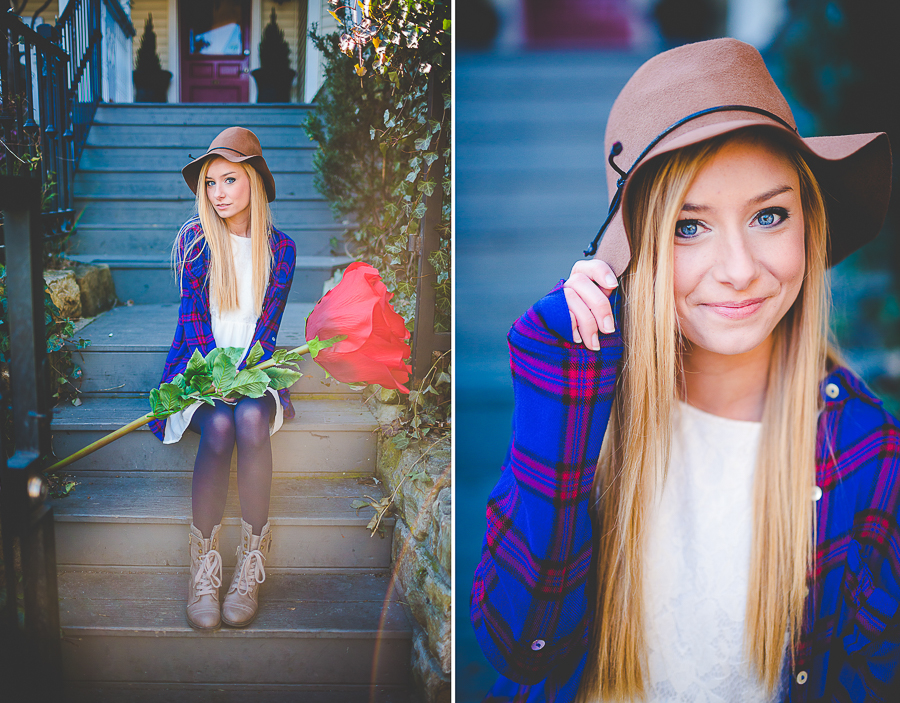
Aperture of Lauren’s Portrait: 1.8 // Laura’s Portraits: 1.2 // Click Away Portrait: 2.5
![]()
![]()
![]()
![]()
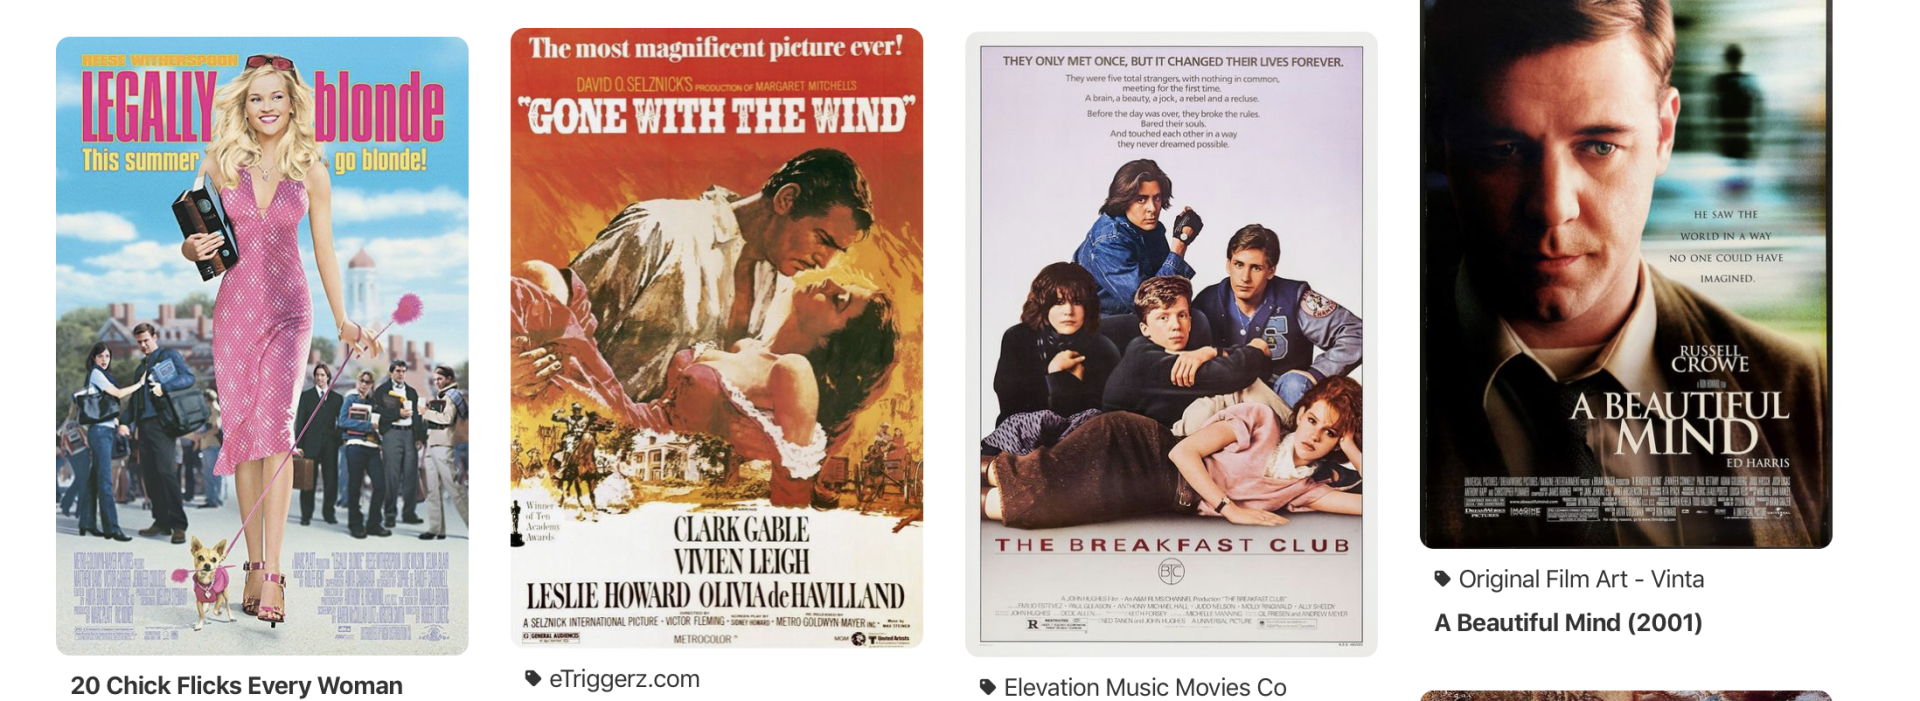
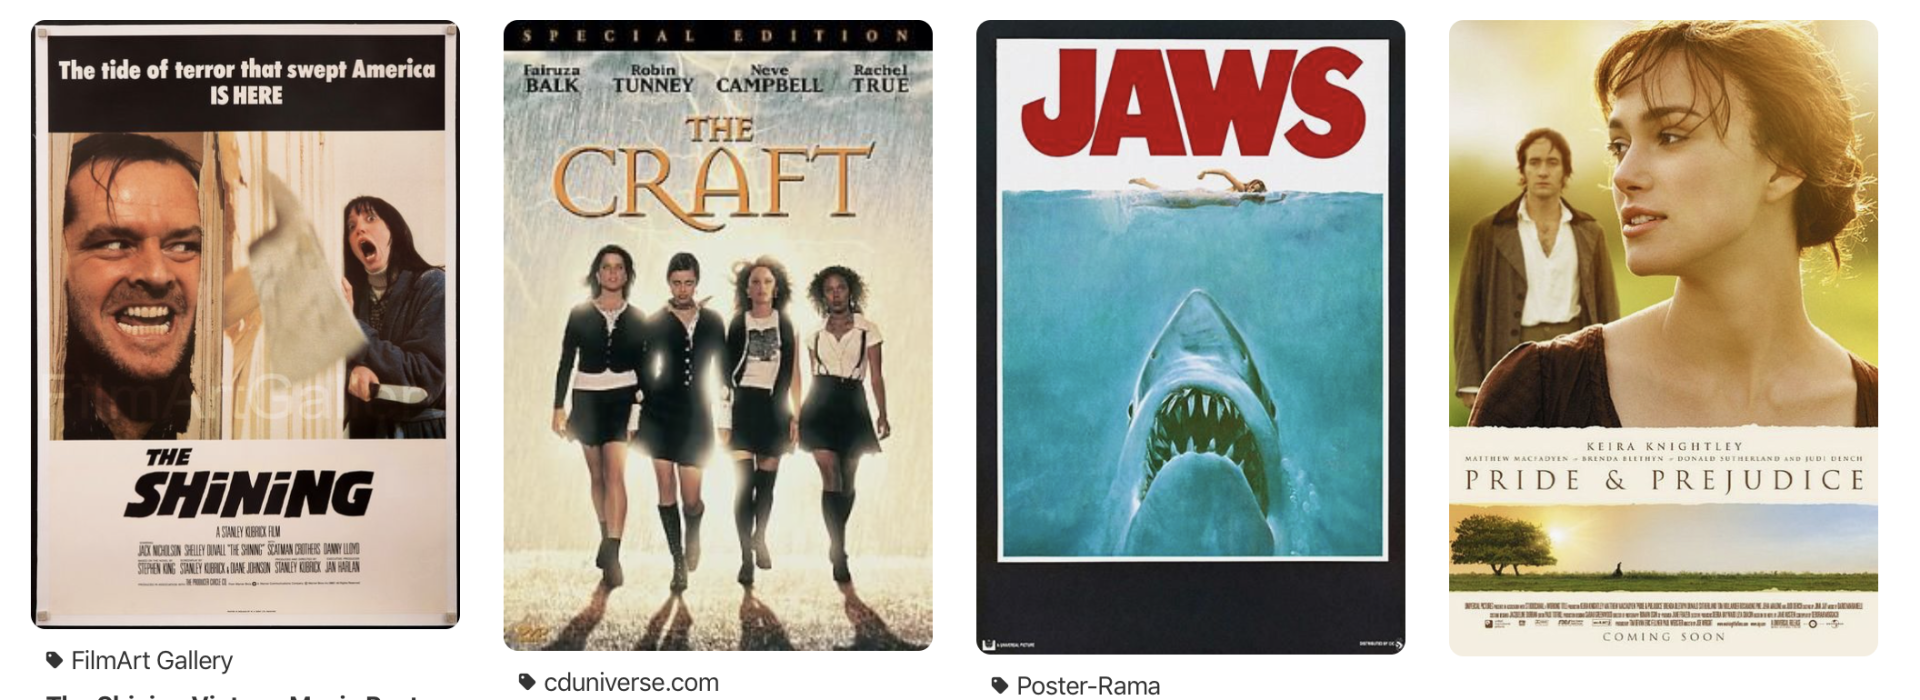
Still confused? Let’s look at movie posters! The poster for Legally Blonde uses the same technique as a wide aperture – Elle Woods is totally in focus and the rest of the cast is blurred behind her. If you look close enough, you can identify different faces but, when looking at the photograph, you are automatically drawn to Elle. She’s in focus, she’s the oddball in the social situation she’s in, and the movie is about her, not an ensemble cast. If the movie was more focused on a group of people, the poster would reflect this.
Now! Compare that to the movie poster for The Breakfast Club. While Molly Ringwald was the star of the 80s, The Breakfast Club is about, well… the Breakfast Club. It’s not just about Molly Ringwald’s character and this is reflected in the movie poster. In the poster, every cast member is in focus and, at first glance, you’re able to individually identify every person in the photograph easily. Everyone is important and everything is in focus. If this was shot as one single photograph (many movie posters are composites), a narrow aperture would need to be used to achieve this effect. Does that make sense?
Here’s a few more movie posters – and a Pinterest board! – for y’all to see!
![]()
![]()
![]()
![]()
Wide Aperture: Gone With the Wind, A Beautiful Mind, Pride and Prejudice
Narrow Aperture: Jaws, The Craft, The Shining
Again, many movie posters are drawings or composites so, when we apply aperture to movie posters, we’re 100% just looking for how focus can be used to draw the viewer in.
Let’s bring this together! Looking at a poster for the original Star Wars movie, Luke is front and center. He’s the most in focus and, behind him the characters are stacked in terms of importance to the story. Han Solo and Leia are in focus and directly behind him and, from there, the characters fade more and more in the background. If this was taken in one single shot, this could be achieved with a wide aperture.
Other movie posters that use the same technique: Bridget Jones’ Diary, Inception, Harry Potter (all of ’em!), Clueless, Space Jam, Hocus Pocus, Lord of the Rings
In these, you’ll notice that there’s a main movie character but there’s also other characters who are important to the movie. Bridget Jones is the heroine of her own movie but the two men in the poster are huge parts of the movie. Because of this, they’re in the poster and they’re relatively in focus. They are not, however, the focus of the poster. It’s Bridget’s movie (and Luke’s movie, and Frodo’s movie and Harry’s movie and Cher’s movie) so Bridget is the main focus of the photograph. This isn’t a blatant wide or narrow aperture but a happy medium between the two. If, however, a much wider aperture was used, Colin Firth and Hugh Grant would fade into the background even more.
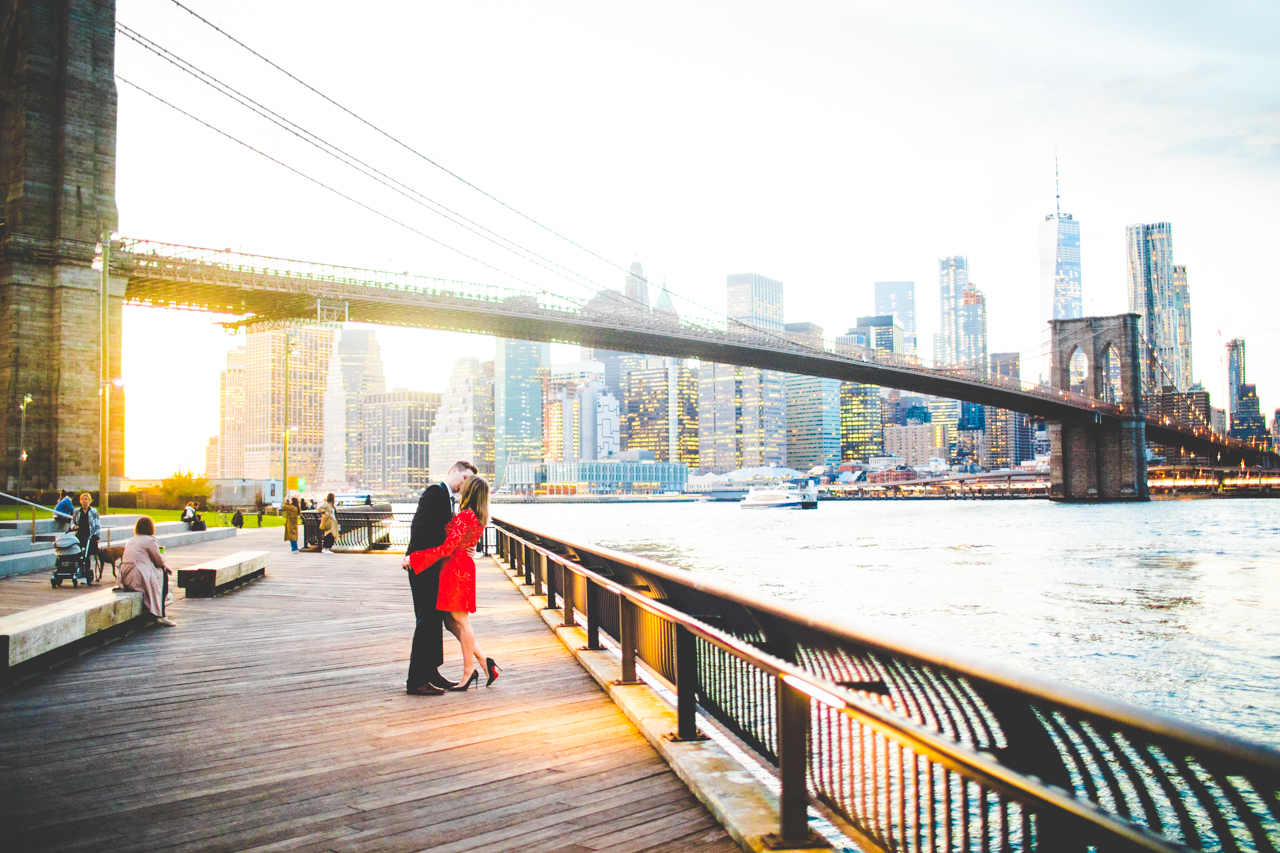
Aperture of Flower Photos: 2.0 // Engagement Photo: 1.6 // Rose Photographs: 1.4
![]()
![]()
![]()
![]()
Whew! That was a TON of info but I have even more!
When talking about aperture, it seems that a narrow aperture would be a lower number and that a wider aperture would be a higher number – if a number is bigger, it seems like since there’s more light (making the aperture wide), the number would reflect this. That’s not how it works, though!
Think of it this way: The smaller the number, the less you have in focus. The higher the number, the more you have in focus. Aperture 100% effects light but, honestly, everything in the Exposure Triangle effects light. Aperture, however, is the only part of the Exposure Triangle that controls how much is in focus. ISO does not change this and Shutter Speed doesn’t control this, either – only aperture can help you create soft backgrounds and, while compositional tricks can always be used to enhance what’s in focus versus what’s not in focus, aperture is a creative choice that is going to vary from each photographer and each circumstance, too. Many of my friends never shoot under 2.0, a few shoot wide open, and others shoot at narrow apertures with frequency. While there are some rules for aperture – as mentioned earlier, you want your bride’s grandma to be in focus in the family formals! – aperture, to me, is the most creative part of the exposure triangle. If you want everything to be in focus, freaking go for it! If you just want a tiny sliver to be in focus, go for that, too! Nothing else will give you this creative freedom. And shooting Manual? You have to know it if you want to have full creative control of your photographs. We are artists! Get that control, y’all!!
And if you’re struggling to nail focus? Check out this dinosaur of an article I wrote about achieving focus at wide apertures several years back! You can do this!!
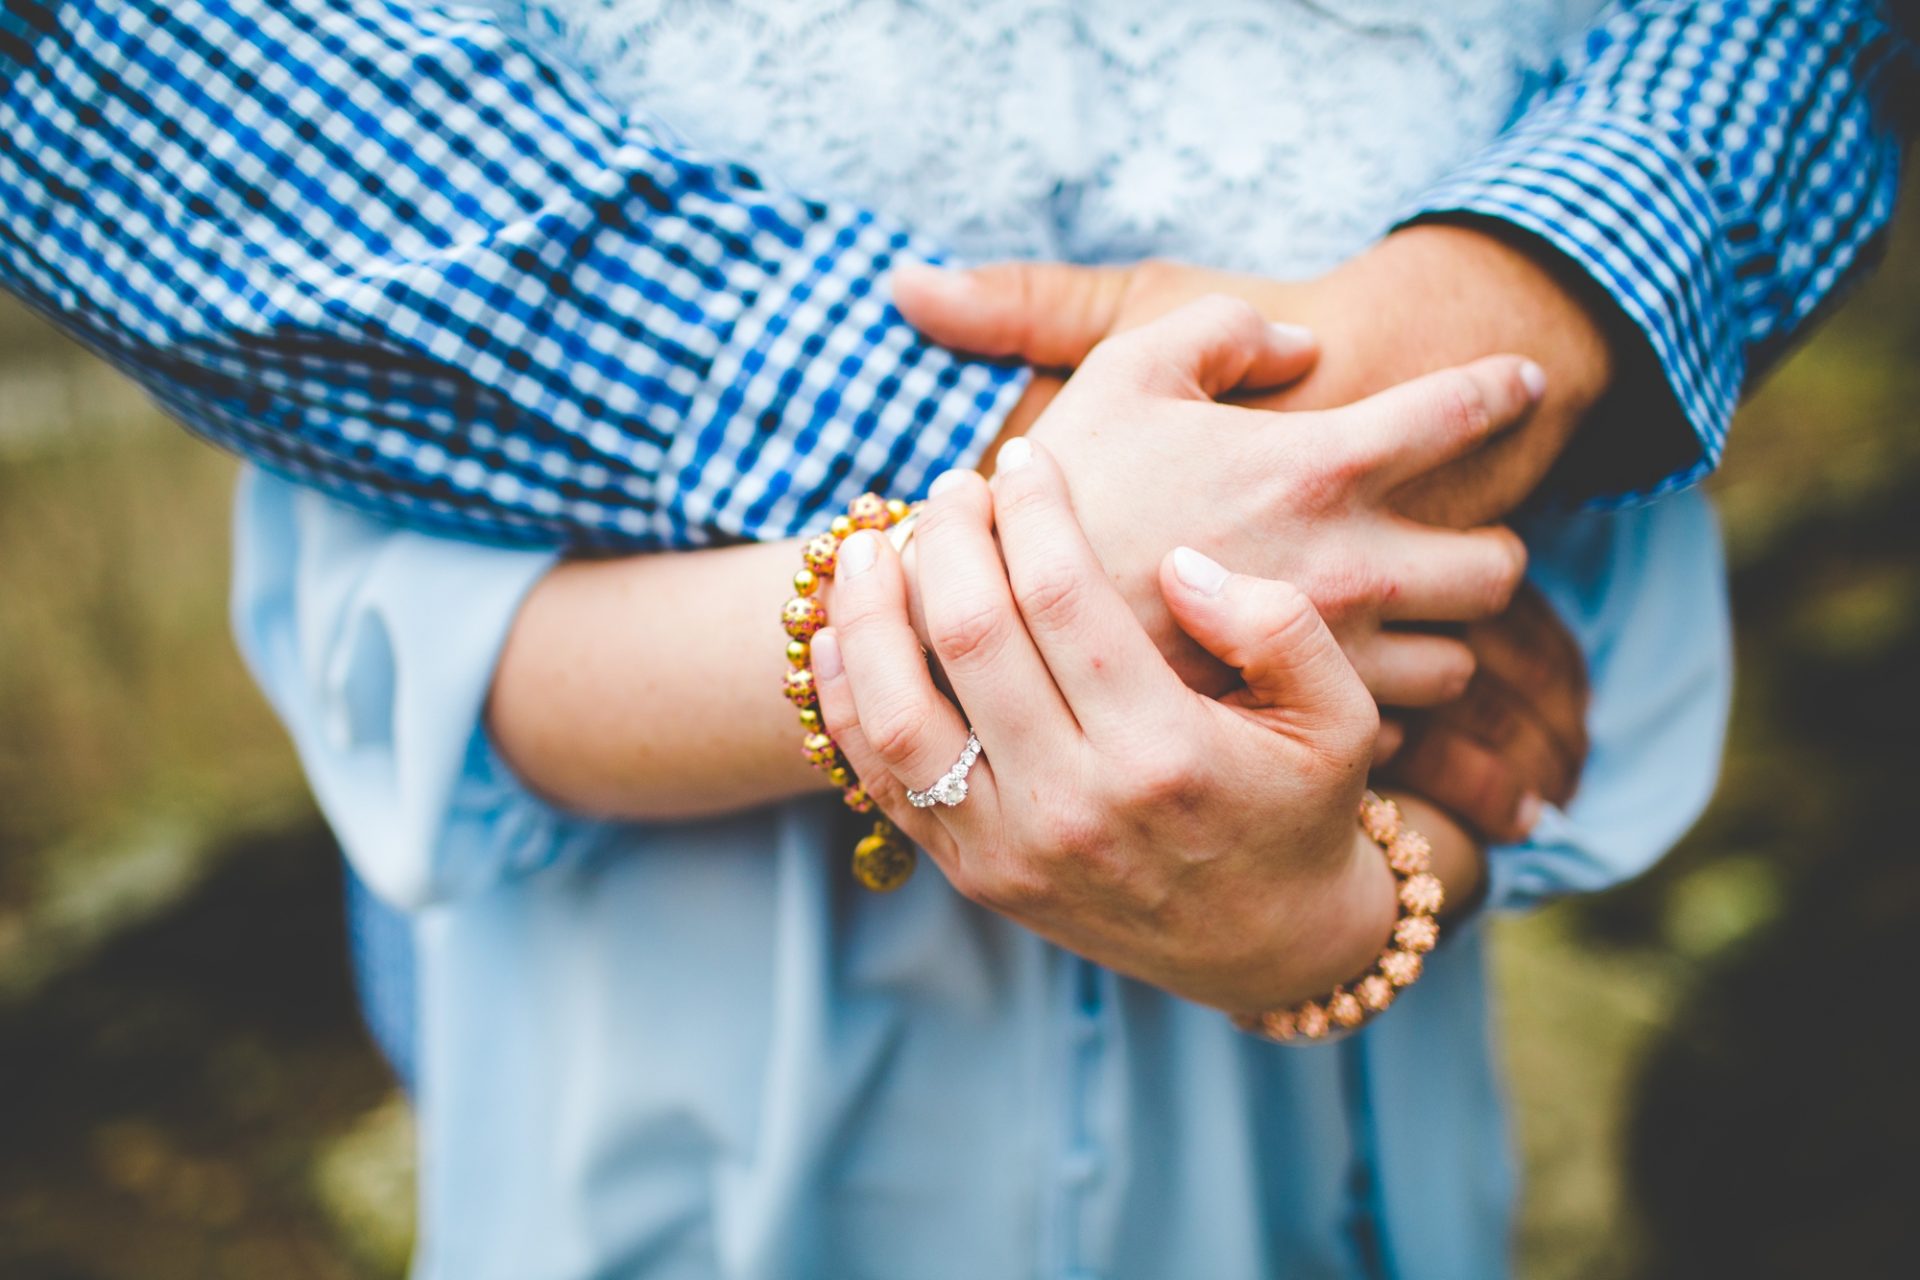
Aperture of Casey and Chad’s Hands: 1.8
![]()
![]()
![]()
![]()
Weddings | Engagements | Seniors | Families | Personal
Inquire About Your Wedding Date + Book A Session With Lissa Chandler Here
Lissa Chandler is an Arkansas wedding photographer based in Fayetteville, Arkansas who woke up one day, switched her camera to Manual, and never looked back!

![]()
![]()