

Morning! Today, I am SO pumped to talk with you about one of my very favorite subjects: consistently nailing focus.
Whaaaat? How Can Nailing Focus Be One Of Someone’s Favorite Photography Subjects?
I mean, I have like a bazillion favorite photography topics but I love talking about nailing focus because it basically crosses everything I love: light, technical skill that becomes muscle memory, and composition. So! Let’s go! Grab your favorite kind of coffee, pull up your latest session, and let’s chat while you edit! My name’s Lissa Chandler and, if you’re new around here, I’m your new photographer mom. If you’re not new? Hey! It’s me! Your old photographer mom. I’m in my late thirties now, so I can say that. Hahaha.
Get ready! I have a ton of information to spill about consistently nailing focus. It’s gonna be a blast!
![]()
![]()
Alright! First! Gotta Go With The Elephant In The Room!
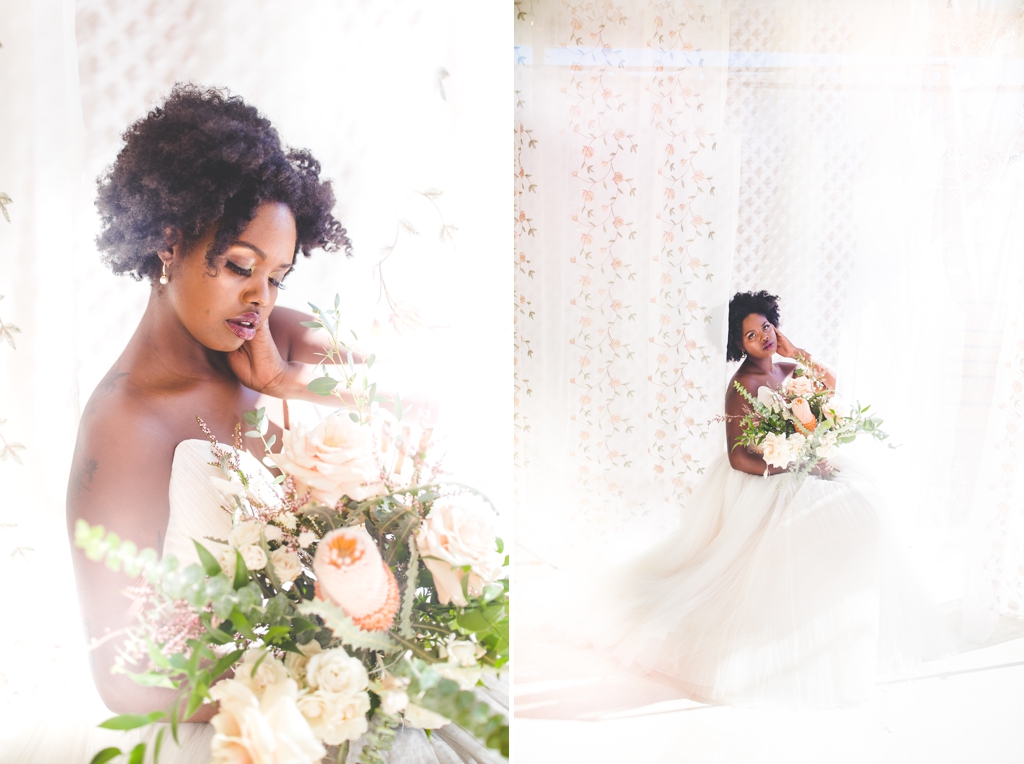
I’m an oldie and I freaking love bokeh. That said, I’m very aware that higher apertures have become more and more popular. I love this! It’s really reminiscent of point and shoot cameras but in, like, a high end artistic way. I think that’s amazing! And I love that, as photography grows, there’s so many more styles to choose from. And if you love small apertures, I think that’s totally incredible. But! Keep in mind with this post! I love shooting pretty open. While I used to be a 1.4 girl through and through, these days I typically keep my camera around 2.0. I do move my aperture around quite a bit depending on shoots – I shoot wide open really frequently but will go up to 4.0 or 5.0 for certain subjects (like wedding family formals or stock photos) – and this preference will absolutely impact my advice.
How Do You Nail Focus When You, In Fact, Love Unique Focus?
First up! Shooting wide open! … Actually, let’s backtrack.
I want this podcast to be easily accessible for all photographers so let’s do a real quick rundown of what aperture is. It’s been awhile since I’ve talked basics so, if I totally biff this, please excuse me. Lol. Aperture controls how much of your image is in focus and, when you start, it can be a little confusing as it’s part of the exposure triangle. Aperture controls how much is in focus but it also controls how much light is let in. So, if you’re shooting wide open, two things are happening. First? Only a small part of your frame will be in focus. Second? You’re letting in as much light as possible. Wide apertures are really popular with light and airy photographers – but it’s also just really popular in general because it’s easier to shoot with a wide apertures in difficult lighting situations with natural light.
When you shoot wide (like f/2 or lower), the rest of your photograph will be out of focus / the background will blur into something called bokeh. Bokeh is a sort of compression and there’s a lot of factors in it. Higher end lenses typically create better bokeh but that doesn’t meant that entry level lenses can’t create bokeh. It’s just smoother in higher end lenses. Like butter!
(Here’s a blog post that goes into aperture more!)
If you’re shooting with a smaller aperture like f/14, more of your frame will be in focus. This is fantastic if you’re shooting something that needs a lot of focus – like a family photograph or a product shot – but there is a downside! The downside? The shallower your aperture is, the less light your lens will let in. So, if you want a lot to be in focus, you want really strong lighting conditions. Want to shoot in darker conditions? Wide apertures are your friend! This is a really fast breakdown – and, again, it’s been a while since I wrote any introductory level material – so, if you have questions, I’ll link a couple blog posts on my website!
One more thought! Aperture numbers can be confusing if you think of them in terms of light. If you can, try to think of the focus part instead! F/1.4? It’s a tiny slice of focus. F/14? It’s a large plane of focus. The converse is true with light – 1.4 will let in way more light than 14 – but, because aperture is the only part of the exposure triangle that controls focus (and the other two parts also directly impact light), it’s easiest to think of aperture as focus, not light. Whew! Hopefully that makes sense! It’s so crazy how, when you’re super used to something, it can sometimes be a mind bender to try and break it down piece to piece. I promise these things become muscle memory!
![]()
![]()
Shooting Wide Open: How To Nail It
Get ready to laugh! If you are shooting really wide – think 1.4 or even 1.2, you basically need to stop breathing.
Here’s how it works! Place your subject, place yourself, bring your camera up to your face and, when you’re ready to shoot, take a real deep breath. For really extremely wide apertures, you can totally lose focus just by moving a bit. Super stressed about a little motion blur! I get that! Make sure your shutter speed is high – over 1/250 – and you should be good to go! When you are trying to nail focus at a really wide aperture, know that it takes time. You won’t get your first lens that opens to 1.2, take it right out of the box, and immediately get every image in focus. Give yourself some learning time!
Another great way to approach this! Lay on your belly!
When you first get a lens that opens really wide, grab your kid or your spouse or a bag of popcorn, set up a mini shoot, and then lay down on the floor. Keep your hips totally flat on the floor, prop yourself up on your elbows, and shoot this way. Doing so will give you more leverage in your body and, if you can hold yourself steady in this position, you’ll be able to grab focus easier than you might be able to walking around like you would at a normal shoot.
More About Wide Open Apertures!
Don’t forget about focal points!
When I was a new photographer, I didn’t realize that I had to select a focal point for my photographs (hahaha). I leaned into soft focus as an aesthetic but, really, it was because I had no idea that focal points have to be selected. Of course, with newer cameras, you can turn on facial recognition software but, honestly, this isn’t a good fit for me. Selecting focal points is pretty relaxing for me. I love that I can control it, of course, but I also love that it’s just something really methodical and routine that I do every time I look through the frame.
![]()
![]()
Back Button Focus
Speaking of routine! I don’t shoot with back button focus.
I know this is super unpopular but I just don’t like it. The feel of pushing the shutter button halfway down is one of my fave feelings – I think it’s a hold over from all those point and shoot cameras in my childhood! – and, while I totally get the need to use back button focus and think it looks really cool (lol), it’s just not for me. But that doesn’t mean it might not be for you! Definitely explore back button focus and see if it’s something you absolutely love. Remember: There is no one right way to do anything. You’ve got this!
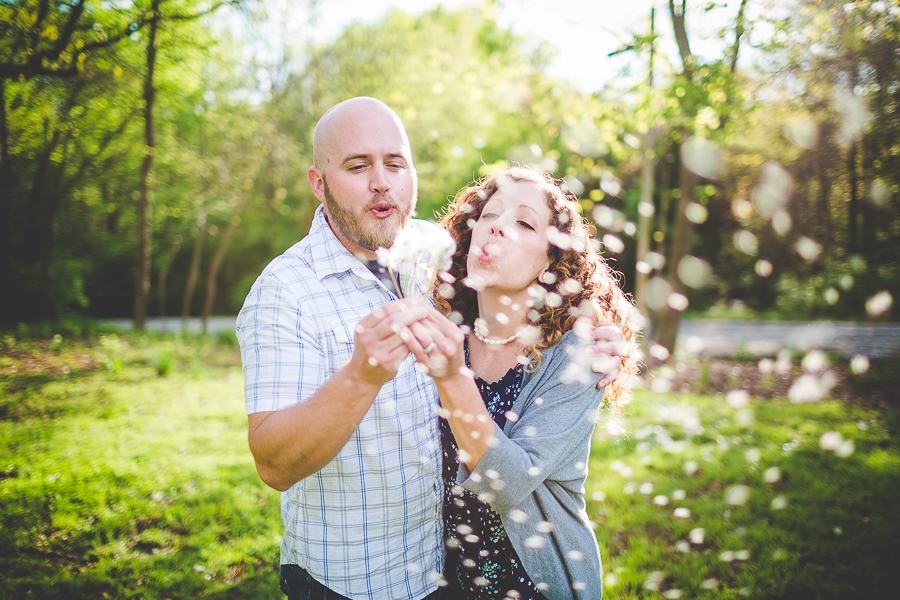
Shooting With Blur: When’s It Okay?
Ooh! This is one of my fave topics, too!
Over the past few years, we’ve seen a huge uptick in blurry images and I love them. However, there are two different types of blurry photographs. If you’re turning photographs black and white because they’re out of focus, that’s not a technique or something you can replicate. They’re happy accidents. If, however, you’re intentionally shooting blurry images for a few highlights in your gallery, this is an awesome way to get creative. Embrace that movement!
Speaking of movement, when you’re shooting blurry photos, don’t forget to experiment. Your subjects can move – run, jump, kiss, twirl, whatever – but don’t forget that you can move, too. Move that camera around! Don’t be drag your camera as you drag your shutter speed. Remember, when shooting blurry photos, you want your shutter speed to be slow. Remember how we just talked about shooting wide open? For blurry photos, you do not want to shoot wide open – turn your aperture up and your shutter speed slow! Nail focus consistently but know that creative freedom is good for you, too!
How Can I Tie Blurry Photos Into My Gallery?
When you’re shooting blurry photographs, think of them as a gallery enhancement.
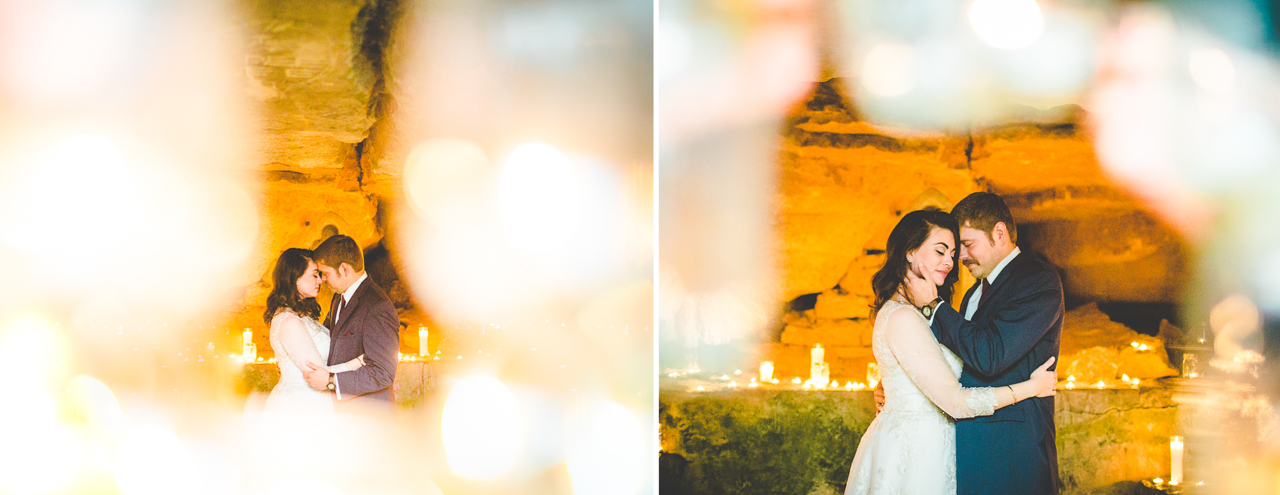
This’ll sound off topic but it’ll tie back together! As a creative photographer, I love shooting through stuff. Prisms, tulle, plastic bags, it really doesn’t matter. I literally used to break mason jars with a hammer and shoot through them and, while at 37 I wouldn’t recommend this as a safe option, my 27 year old self absolutely loved doing this because the glass shards were unpredictable. I think that’s the funniest part of getting farther into my photography career as a mom – when my career was new, I wasn’t worried about things like glass fragments from mason jars and, now, I immediately just go to the fact that it’s not the smartest to carry mason jars around in my photography backpack, lol.
Anyway! As much as I love shooting through stuff, I do not do this with every photograph – or even at every session.
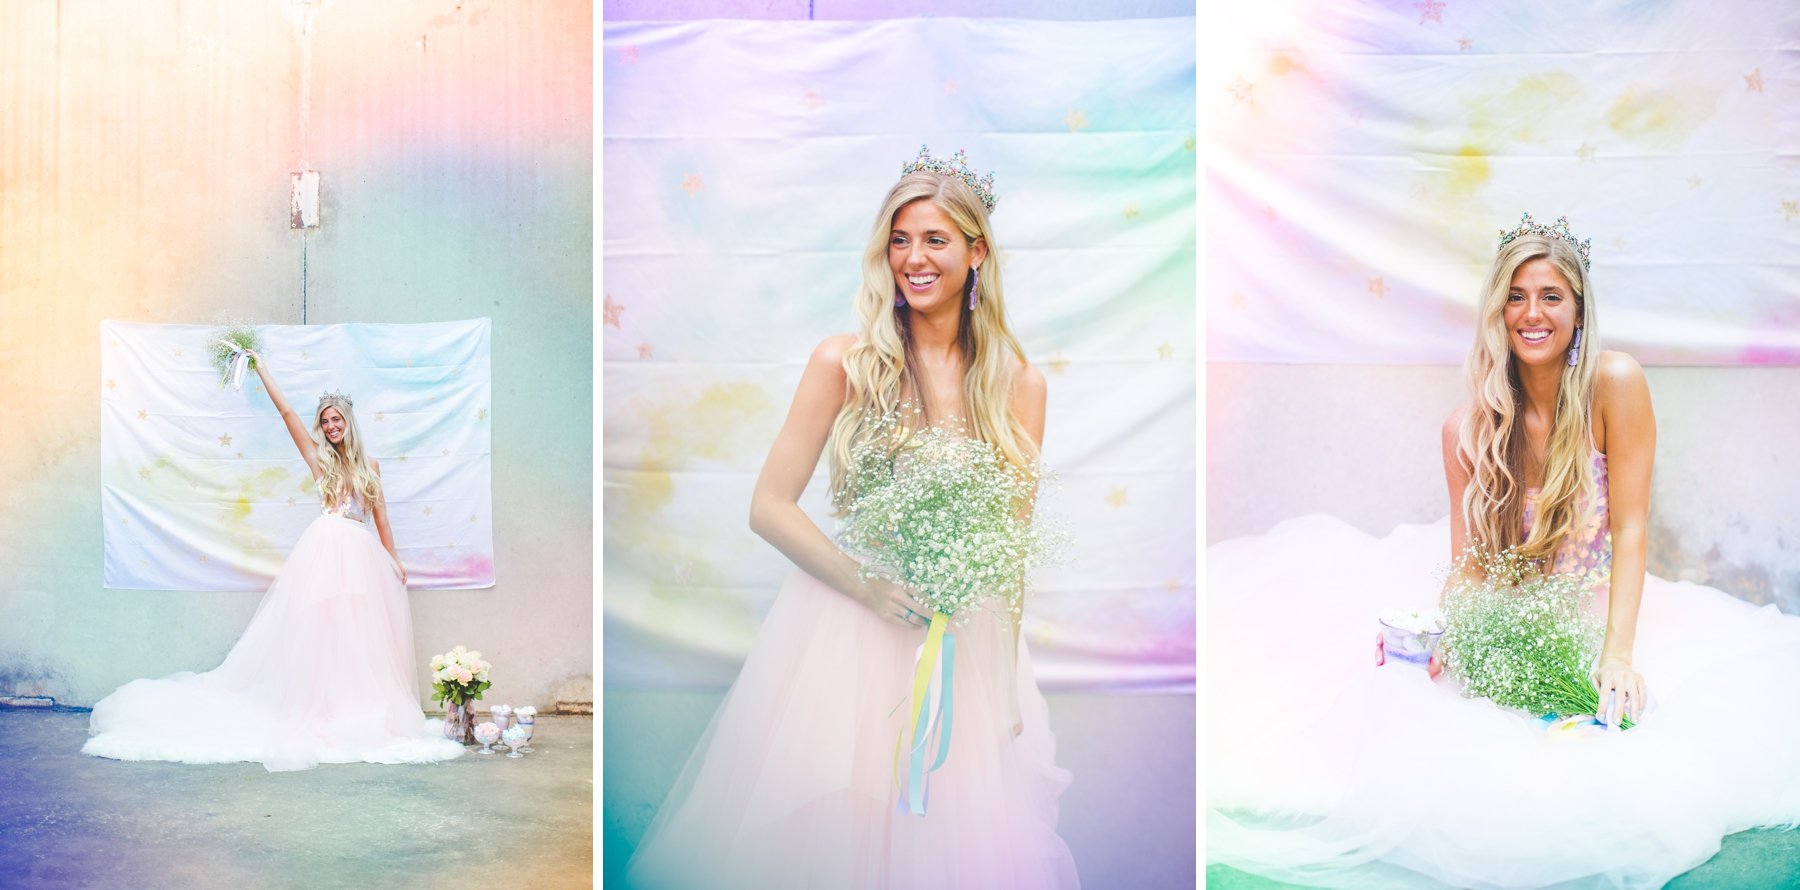
Y’know how, when you’re shooting details, it’s good to go big and then small? Blurry photographs are the same. Take a blurry photograph but mix it into a gallery. Even if you market with a lot of blurry photographs, you’ll want to take normal photographs, too. So, take the creative photograph, put your settings back to normal, and then take a safer option. I don’t recommend doing this because I’m a stick in the mud – quite the contrary! – but, when you’re shooting extra creatively, think of the photographs as a page in an album or as an Instagram carousel. You want the emotion from the creativity, but you need the standard photo with consistent focus for context.
![]()
![]()
Is It Hard To Switch Mindsets Between Creative Focus and Technical Focus?
I wouldn’t say that it’s difficult to switch from creative focus to technical focus but I would say that it takes practice.
Here’s what I mean! Creative focus – blurry photographs, photos shot through a surface, light painting, etc. – are all created to convey an emotion. While photographs with traditional focus also convey emotions, the end goal is a little different. Think of creative focus as abstract and traditional focus as, well, traditional. Together, these two types of focus can really elevate a gallery to have a ton of emotion that they could not achieve if the gallery was only made up of one type of focus.
The biggest hurdle with this is mindset. It’s not hard to switch from Manual focus to Auto focus but, the first few times you do this, it may feel like you’re taking a step backwards. Don’t fall into that feeling! Just know that, just with shooting in Manual, things take time. Eventually, you’ll be able to switch from creative focus to traditional focus without the thought even registering. I think that’s my favorite part about photography! That it’s a technical thing to learn but then, when you’re used to those technicalities, everything just turns into creative work. It’s so rad!
What Do I Do If I Miss Focus?
When you miss focus, be easy on yourself!
Losing focus will happen less and less the more you shoot but it can literally happen to anyone. Like, you can be positioned perfectly but it the wind wraps someone’s hair differently than you expected, your focus could be off. And that’s okay! When dealing with images that are close-to-focus but not 100% where you like them, look at them critically. I know that’s so hard to do – photography is our art! – but I recommend passing them up while editing and then coming back to them. Flag them differently than your definite keepers and, when you come back at the end of the gallery, see if they will enhance the gallery or not.
Also! If you are editing on a huge computer screen, you’re way more likely to notice imperfections. And if you’re zooming into someone’s eye from a full body shot? There’s a huge change the focus will be a little soft, no matter how consistently you’ve nailed focus. This doesn’t mean the photo is a dud and it definitely doesn’t mean you should trash the photograph. It does mean, though, that not everyone is meant for pixel peeping. When I go down the pixel peeping path, it almost never ends well for me. And I usually only take a few totally out of focus shots a year!
Be nice to yourself, y’all! Don’t turn over work you wouldn’t claim as your own but also don’t think that everything needs to be ready to hang in a museum that’ll showcase portraiture 500 years from now. Most of us are not Hans Holbein, y’know?
Will This Become Second Nature?
Absolutely! The longer you shoot, the more things become seamless.
Focus used to be something that kept me up at night and, as I mentioned earlier, I didn’t even know what a focal point was when I started photography. Today, I only think about focus if I feel like my camera is lagging or a lens is being goofy. Focus is a technical skill that you can move and break and twist for creative expression. Don’t be afraid to try new things! Just remember to include photographs that feel a little more traditional, too.
And if you shoot a ton of creative work? Think of a fun way to incorporate traditional shots!
Personally, I call traditional smiling photographs “Mom Shot” because it’s funny and because everyone knows what that means. A cute smiling photograph where everyone looks at the camera. Are they the star of my gallery? Nope! Are they the ones that make my photographer heart swoon? Also no. But! They’re traditional for a reason, they’re easy for people to frame, and they only take a few seconds.
Thanks so much for being here, y’all!
Have any questions about nailing focus or want to request a future podcast topic? Contact me here!
![]()

![]()
Galleries + Links + More
Weddings | Engagements | Seniors | Families | Personal | Photographers
Etsy Shops: Tee Shirts + Sweatshirts + Puzzles + Pillows | Mockup Photos
Based in Fayetteville, Arkansas Lissa Chandler is a traveling portrait and wedding photographer. Lissa is also the owner of Opal and June where she offers unique mockup photographs, bookish + history merch, and the dreamiest photoshoot dress rentals. Additionally, Lissa is the creator + instructor of The Hue of You, an online (and rad!) four week editing course offered through Click Photo School, and the host of the podcast Your Photographer Mom.
Inquire About Your Wedding Date + Book A Session With Lissa Chandler Here
![]()